Introduction
In Part 1, I discussed the background and setup information you would need to successfully embark on a client site widget for SharePoint that accesses the Microsoft Graph API (MSGraphAPI). In Part 2, we went in depth to the various ways of utilizing the adal.js and adal-angular.js libraries for authentication. Now, here in Part 3 we’re going to get right into the nuts and bolts of a real solution that does the following:
- Utilizes a third-party JavaScript library to create an Excel file
- Uses the MSGraphAPI to upload the file into a SharePoint document library
- Manipulates the file using the Excel endpoints that are part of the MSGraphAPI
To be fair the third party library we’re using can manipulate the Excel file, but I want to leverage the API built by Microsoft that does more. Plus, it’s just a fun demo.
Setup
In Part 2, I gave three different examples of configuring and utilizing the ADAL library. The first step would be to create your “solution” and configure ADAL appropriately depending on whether you’re going to use AngularJS with ngRoute or Components or something else. I’m assuming you know how to implement one or the other of those patterns so I will only be including the code for the functions themselves in the text and not the overall project. Keep in mind I wrote my code using AngularJS so if you see a reference to “vm.”, in the code, that’s a reference to a UI binding property.
The MSGraphAPI root URL for the SharePoint library requires a couple of components that you’re going to have to gather together. The first is the site collection id, which is a GUID you can get by pasting https://{your tenant}.sharepoint.com/{your site collection}/\_api/site/id in a browser. The second is the GUID of the library you want to access. You can get that most easily by navigating to the settings page of the library and decoding it from the URL.
UPDATE 5/2017: Due to a change in the SharePoint beta endpoints as a result of the sites endpoint going to v1.0 you will also need the web id, also a GUID you can get by pasting
https://{your tenant}.sharepoint.com/{<}your site collection}/\_api/site/rootweb/idin a browser. Or, if the site you’re referencing is a sub site you will need to reference that instead and get the GUID. On the page, we have a button that executes the “createFile” function. I’ve used promise chaining here so that we can make sure we execute the asynchronous calls to do the various pieces of work in the right order. Here are the steps with a brief description and some highlights (if applicable) and then the actual code.
| # | Function | Description | Return Values |
|---|---|---|---|
| 1 | createXlsx | Utilizes the SheetJS/xlsx library to create an empty Excel file. | A JavaScript arraybuffer that can be uploaded to SharePoint/OneDrive. |
| 2 | saveXlsx | Utilizes the MSGraphAPI to upload the file to the specified SharePoint library. | The id of the file, and a temporary URL which can be used to download the file. This is more applicable to OneDrive but can be handy if you want to put the URL into the page after you complete your operations on it. |
| 3 | getWorksheets | Utilizes the MSGraphAPI Excel endpoint to get a list of worksheets in the Excel File | |
| 4 | updateCell | Utilizes the MSGraphAPI Excel endpoint to change the value of a cell |
There is obviously a huge number of other things you could do with Excel file, including adding and retrieving charts and tables, etc. Some “global” variables I’ll reference in some of the functions:
vm.message = "";
vm.Worksheets = \[\];

var fileName = null;
var tempID = null;

var \_CONFIG.SP\_EP = "https://graph.microsoft.com/beta/sites/sympraxis.sharepoint.com,78f5843c-7845-4273-8be7-9253552a473f,caff9905-d491-49ea-a625-1c279cb0bc4d/lists/7bc97907-9a6c-4959-9474-946d854a81a8/drive/"
UPDATE 5/2017: The url for the beta endpoint changed slightly in that https://graph.microsoft.com/beta/sharepoint/sites became https://graph.microsoft.com/beta/sites and the documentation that says {site-id} is really a triplet that includes the {hostname},{spsite-guid},{spweb-guid} The createFile function is executed by the user clicking a button/link.
var createFile = function () {
    //Get the XLSX array buffer.
    var xlsBuffer = createXlsx();
    //Save the file to the SP Doc Library
    saveXlsx(xlsBuffer).then(function (response) {
        vm.message = "File: " + fileName + " was written successfully.";
        tempID = response.data.id;
        //Get an array of worksheets in the XLSX file.
        return getWorksheets();
    }, function (error) {
        $q.reject(error);
    })
    .then(function (response) {
        //Display the worksheet array in the UI
        vm.Worksheets = response.data.value;
        var dateNow = new Date();
        //Define the array of values and their format, there are other options too see documentation for more examples.
        var rangeVals = { values: \[\[(dateNow.getMonth() + 1) + "/" + (dateNow.getDate()) + "/" + (dateNow.getFullYear())\]\], numberFormat: \[\["mm-dd-yyyy"\]\] };
        //Update a range in the workbook, in this case only one cell.
        return updateCell(rangeVals);
    }, function (error) {
        $q.reject(error);
    })
    .then(function (response) {
        //We're done
        vm.message = "File " + fileName + " updated";
    }, function (error) {
        $q.reject(error);
    })
    .catch(function (error) {
        console.log(JSON.stringify(error));
    });
};
Creating the Excel File
As I said earlier, we’re going to utilize a third-party library to create the Excel file. To me this seems like obvious missing functionality from the MSGraphAPI, but there may be reasons for this of which I’m unaware. So until it’s added, we can use SheetJS/js-xlsx. The documentation provides a nice simple example for creating a valid xlsx document.
var sheet\_from\_array\_of\_arrays = function (data, opts) {
    //Taken from example provided by SheetJS/XLSX documentation.
    var ws = {};
    var range = { s: { c: 10000000, r: 10000000 }, e: { c: 0, r: 0 } };
    for (var R = 0; R != data.length; ++R) {
        for (var C = 0; C != data\[R\].length; ++C) {
            if (range.s.r > R)
                range.s.r = R;
            if (range.s.c > C)
                range.s.c = C;
            if (range.e.r < R)
                range.e.r = R;
            if (range.e.c < C)
                range.e.c = C;
            var cell = { v: data\[R\]\[C\] };
            if (cell.v == null)
                continue;
            var cell\_ref = XLSX.utils.encode\_cell({ c: C, r: R });
            cell\["t"\] = 's';
            ws\[cell\_ref\] = cell;
        }
    }
    if (range.s.c < 10000000)
        ws\['!ref'\] = XLSX.utils.encode\_range(range);
    return ws;
};

var createXlsx = function () {
    //Create an empty workbook
    var emptyWB = { SheetNames: \[\], Sheets: {} };
    //Get a new worksheet that has nothing in it.
    var ws = sheet\_from\_array\_of\_arrays(\[\[null\]\], null);
    var wsName = "Sheet1";
    //Add the blank worksheet to the workbook
    emptyWB.SheetNames.push(wsName);
    emptyWB.Sheets\[wsName\] = ws;
    //Create the xlsx file
    var wbOut = XLSX.write(emptyWB, { bookType: 'xlsx', bookSST: true, type: 'binary' });
    //Create an array buffer from the file.
    var buf = new ArrayBuffer(wbOut.length);
    var view = new Uint8Array(buf);
    for (var i = 0; i != wbOut.length; ++i)
        view\[i\] = wbOut.charCodeAt(i) & 0xFF;
    //Return the array buffer so that it can be uploaded.
    return buf;
};
Saving the Excel File to a SharePoint Document Library
The saveXlsx function utilizes the new beta endpoints that access SharePoint through the MSGraphAPI rather than the SharePoint REST endpoints. So, to save the file to the SharePoint library we use the base URL defined by the _CONFIG.SP_EP variable. See the Setup section for details on putting this URL together. Because we are using adal-angular.js we can create a function that will execute the $http request and will append the authentication token to the header all without having to do anything extra.
var saveXlsx = function (fileArrayBuffer) {
    var dateValue = new Date();
    var dateString = dateValue.getMilliseconds().toString();
    fileName = 'newXlsx' + dateString + ".xlsx";
    //\_CONFIG passed in from AngularJS constants
    var fileUrl = \_CONFIG.SP\_EP + "root:/" + fileName + ":/content";
    //Create a Blob out of the array buffer of type octet-stream
    var fileBlob = new Blob(\[fileArrayBuffer\], { type: "application/octet-stream" });
    //Call MSGraphAPI to put new XLSX file in SharePoint library.
    return $http({
        url: fileUrl,
        method: "PUT",
        data: fileBlob,
        headers: {
            "Content-Type": "application/octet-stream",
            Accept: "application/json;odata.metadata=minimal"
        }
    });
};
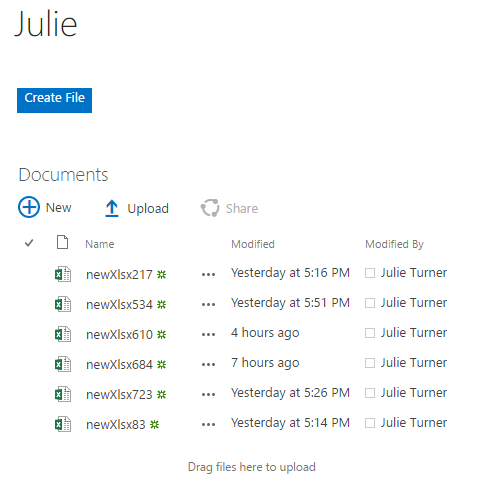
We could, alternatively use the SharePoint REST endpoints to get the file into place; using the MSGraphAPI to upload the file is certainly not a requirement. However, since we are using the MSGraphAPI, the return payload includes an id that will then use later. We’re going to save that value in a variable called tempID. At this point, our new, empty Excel file is sitting in our document library. In and of itself, this is pretty darn cool. Ok, let’s move on.
Manipulating the Excel File
I’ve included a simple read method and a very basic update method here, just to give the general idea. First, the read method gets an array of Worksheets in the Excel file. If you recall from the createXlsx function we only put one sheet in the file, so the result is an array with one item. We then assign the array to a binding variable and display it in the UI.
var getWorksheets = function () {
    //Get an array of worksheets from the workbook, you'll recall we only made one.
    var xlsFileUrl = \_CONFIG.SP\_EP + "items/" + tempID + "/workbook/worksheets";
    return $http({
        url: xlsFileUrl,
        method: "GET",
        headers: {
            Accept: "application/json;odata.metadata=minimal"
        }
    });
};
Second, we’ll update a cell in the worksheet. To do this we’ll have to provide a payload of data and then identify the range we want to update. I’ve hardcoded it here but obviously, you can make this dynamic. Here’s the payload, that we set up in the createXlsx function…
var dateNow = new Date();
var rangeVals = { values: \[\[(dateNow.getMonth() + 1) + "/" + (dateNow.getDate()) + "/" + (dateNow.getFullYear())\]\], numberFormat: \[\["mm-dd-yyyy"\]\] };
…and then passed to the updateCell function in the data payload of the $http call.
var updateCell = function (rangeData) {
    //Update a range (or cell) of data
    var xlsUpdateCell = \_CONFIG.SP\_EP + "items/" + tempID + "/workbook/worksheets('Sheet1')/range(address='A1')";
    return $http({
        url: xlsUpdateCell,
        method: "PATCH",
        headers: {
            Accept: "application/json;odata.metadata=minimal"
        },
        data: rangeData
    });
};
Summary
I’m excited to be able to provide this coverage of the process of utilizing the MSGraphAPI from a client side solution in SharePoint. I really hope that it helps someone somewhere get up to speed quicker and create some awesome solutions of their own. I’m providing a link to my GitHub repo where you can download this AngularJS sample in its entirety. You’ll need to provide your own tenant id, client id, site collection id, and library id, but otherwise it should work as described here. Please feel free to comment or reach out to me on Twitter (@jfj1997) if you have any questions.
Resources
OAuth Flows
- Andrew Connell - Looking at the Different OAuth2 Flows Supported in AzureAD for Office 365 APIs
- Microsoft - Integrating applications with Azure Active Directory
- Microsoft - Should I use the v2.0 endpoint?
ADAL
- GitHub - Azure Active Directory Library for JS
- Cloud Identity - Introducing ADAL JS v1
- Cloud Identity - ADAL JavaScript and AngularJS – Deep Dive
- Cloud Identity - Getting Acquainted with AuthenticationResult
- Cloud Identity - Getting Acquainted with ADAL’s Token Cache
- Microsoft - Call the Microsoft Graph API using OAuth from your web part