Custom field validation using JSLink is an extremely powerful beast. In this post I’m going to make an effort to demystify the different levels of validation you can put into your custom template and how to put it together. Everything I’m about to cover has been covered before in different ways and in different combinations. My hope is that this will help separate out what’s needed and what’s not depending on your scenario… so to that end I’ll cover three scenarios. Basic, which will be OOB validation that is custom applied. By that I mean you want to optionally make a field required just like SharePoint does, but you want to control when it’s required. Custom, which will be a custom validation function that renders its error message just like OOB validation error messages are rendered. And finally, advanced, where not only do you want to write a custom validation but you want to control how the error state is communicated to the user.
So let’s start at the beginning and we’ll build on the solution from there. First I want to establish the framework for the solution:
window.My = window.My || {};
My.CustomTemplate = function() {
   var taskOwnerValidator = function () {
      /\* see below \*/
   }

   function editTaskOwner(ctx) {
      /\* see below \*/
   }

   function registerTemplate() {
      var overrideCtx = {};
      overrideCtx.Templates = {};
      overrideCtx.Templates.Fields = {
         'TaskOwner': {'EditForm': editTaskOwner }
      }
      SPClientTemplates.TemplateManager.RegisterTemplateOverrides(overrideCtx);
   };
}
Basic
Basic validation is fairly straight forward. You would simply add this code inside of your custom field rendering function (editTaskOwner).
First set up the form context and then create a new “ValidatorSet”:
1: var formCtx = SPClientTemplates.Utility.GetFormContextForCurrentField(ctx);
2: var validators = new SPClientForms.ClientValidation.ValidatorSet();
In the next line we add the new validator to the validation set:
3: validators.RegisterValidator(new SPClientForms.ClientValidation.RequiredValidator());
And then lastly, we attach the validation set to the field. In the case of this example I’m using formCtx.fieldName… but this could obviously also be a simple string. I bring this up, because there are limitations on what types of fields you can customize using Custom Templates, namely Taxonomy fields… this is a way to add validation to them from somewhere else in your code.
5: formCtx.registerClientValidator(formCtx.fieldName, validators);
Note: If you’ve noticed I skipped line 4, more on that later.
The Basic Result

Custom
If you want to write your own validation then you need to do a few extra steps.
Create the custom validation function. This function would go within your validation function but outside of the field custom render function (see the framework at the top)
var taskOwnerValidator = function () {
taskOwnerValidator.prototype.Validate = function(value) {
var isError = false;
var errorMessage = ""
if (value === null) {
isError = true;
errorMessage = "You can't leave this blank.";
} else if (documentLibrary.length > 0) {
var vKey = eval(value.toString())[0].Key;
if (possibleOwners !== null) {
if (JSON.stringify(possibleOwners).indexOf(JSON.stringify(vKey)) < 0) {
isError = true;
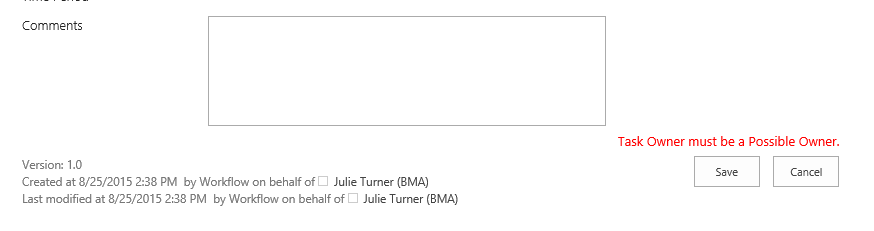
errorMessage = "Task Owner must be a Possible Owner.";
}
}
}
return new SPClientForms.ClientValidation.ValidationResult(isError, errorMessage);
};
};
Modify the RegisterValidator call
3: validators.RegisterValidator(new taskOwnerValidator());
(Optional) Depending on how you render the field you may have to add the following code. What I mean by that is if you use one of these OOB field rendering functions you do not need this line, if you develop your own layout then you will need this to “attach” the error message to the right object in the DOM. In this example my custom people picker field is rendering html wrapped with <div id=”TaskOwnerDiv”></div>. So I need to reference the div’s ID in the SPFormControl_AppendValidationErrorMessage call.
4:  formCtx.registerValidationErrorCallback(formCtx.fieldName,
   function (errorResult) {
      SPFormControl_AppendValidationErrorMessage("TaskOwnerDiv", errorResult);
   }
);
The Custom Result

Advanced
So, if that didn’t seem advanced enough for you, the last scenario is that you may want to customize how the “error” is displayed to the user. Maybe you want to display an image, or collect all the validation messages into one area. That’s possible by doing the following:
Write custom error rendering code. This code needs to be completely outside of the custom rendering template code. Here’s a really basic example.
My.CustomError = function(errorResult) {
    var retHtml = '

' + errorResult.errorMessage + '

';
    $($("#part1")[0].children[3]).after(retHtml);
}
Modify the registration of the error callback, which causes your custom function to be fired if the isError flag is true.
4: formCtx.registerValidationErrorCallback(formCtx.fieldName, My.CustomError);
The Advanced Result
So, as you can see custom form validation is extraordinarily powerful with Custom Templates and can allow you to really take SharePoint to the next level.